Product: Gidex
How to Bridge Tokens on GiDex
Bridging is how you move tokens from one blockchain to another. If your tokens are on Ethereum but you want to use them on BNB Smart Chain (or any other supported network), the GiDex Bridge handles the entire transfer for you.
GiDex routes your transfer through the best available bridge protocols, so you get the fastest speed and lowest cost without having to compare different bridges yourself. This guide will walk you through bridging USDT from Ethereum to BNB Smart Chain as an example.
Step 1: Open the Bridge Page
Go to app.ginox.io in your browser. On the left sidebar, click "Gidex - Defi". Then click "Bridge" in the bottom navigation bar.
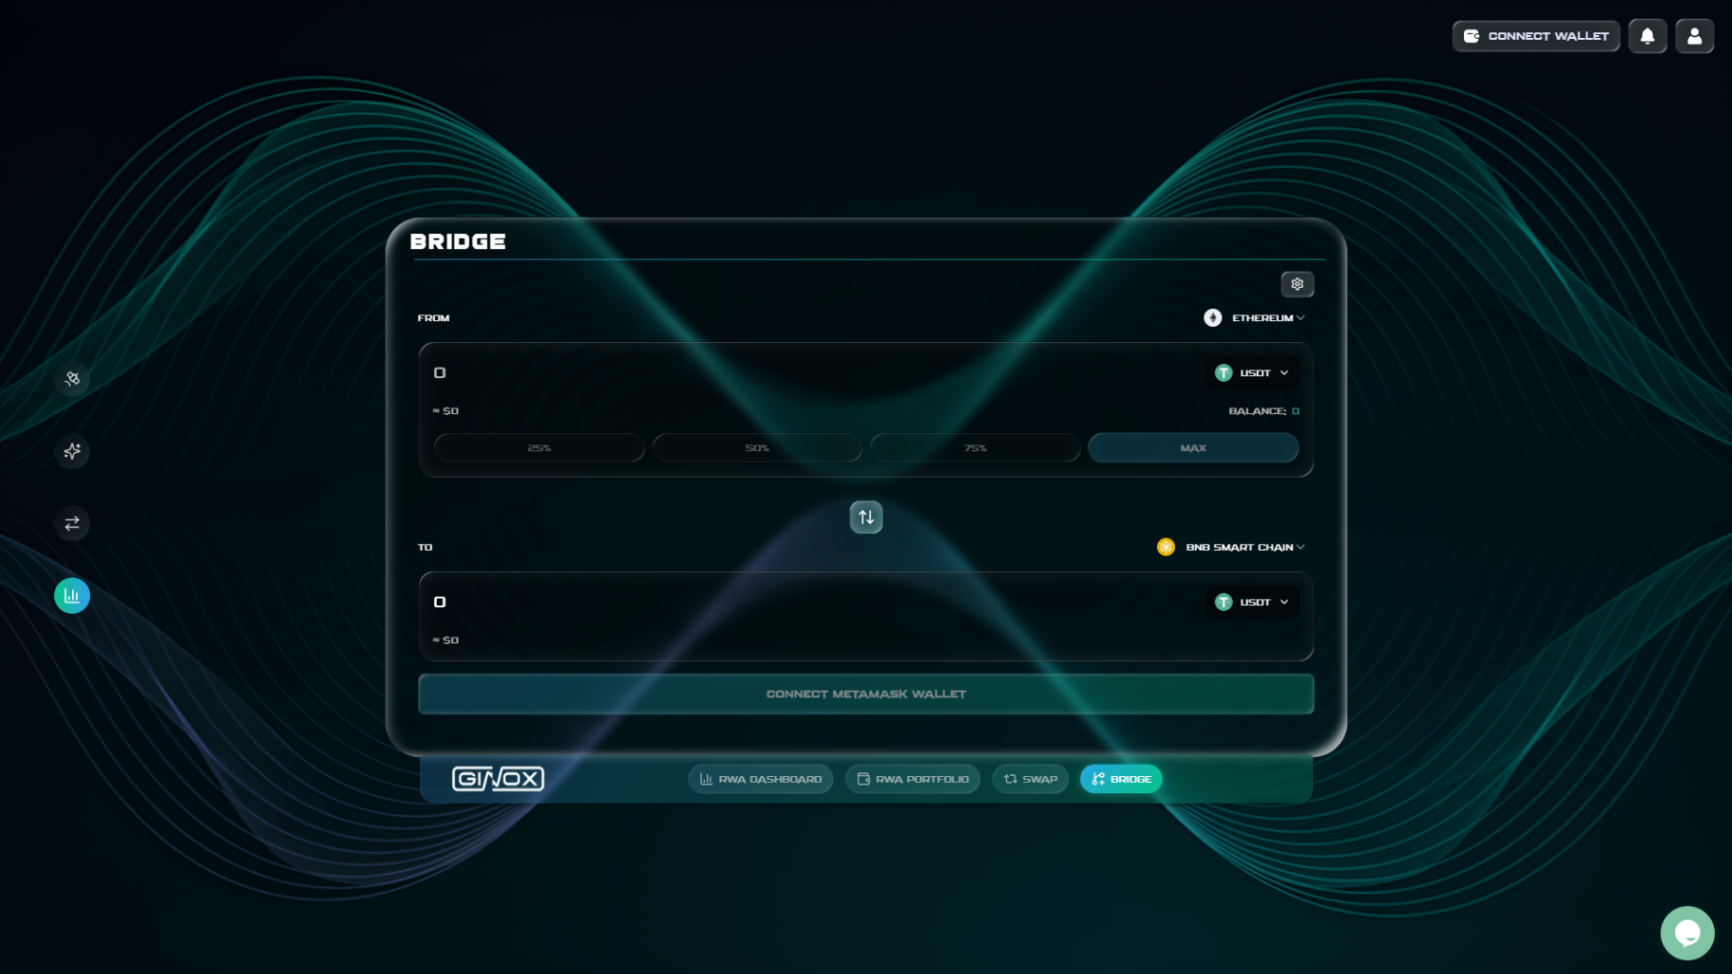
The Bridge page on GiDex showing a USDT transfer from Ethereum to BNB Smart Chain.
Step 2: Connect Your Wallet
Click the "Connect Wallet" button in the top-right corner. Select your wallet from the popup (for example, MetaMask) and confirm the connection. You will be asked to sign a message to log in. No email or password needed.
Make sure your wallet is connected to the chain you want to send tokens FROM. If you are bridging from Ethereum, your wallet should be on the Ethereum network. GiDex will prompt you to switch networks if needed.
Step 3: Select Your Source Chain (FROM)
Click the chain dropdown next to "FROM" and pick the network where your tokens currently are. For this example, select Ethereum.
GiDex currently supports bridging between these chains:
- Ethereum
- BNB Smart Chain
- Arbitrum
- Optimism
- Base
- Avalanche
- Polygon
Step 4: Select Your Destination Chain (TO)
Click the chain dropdown next to "TO" and pick the network where you want your tokens to go. You will notice that the chain you already selected for FROM is not shown in the TO list, since you cannot bridge to the same chain.
For this example, select BNB Smart Chain. If you change your mind about the direction, click the swap icon between the FROM and TO sections to quickly flip them.
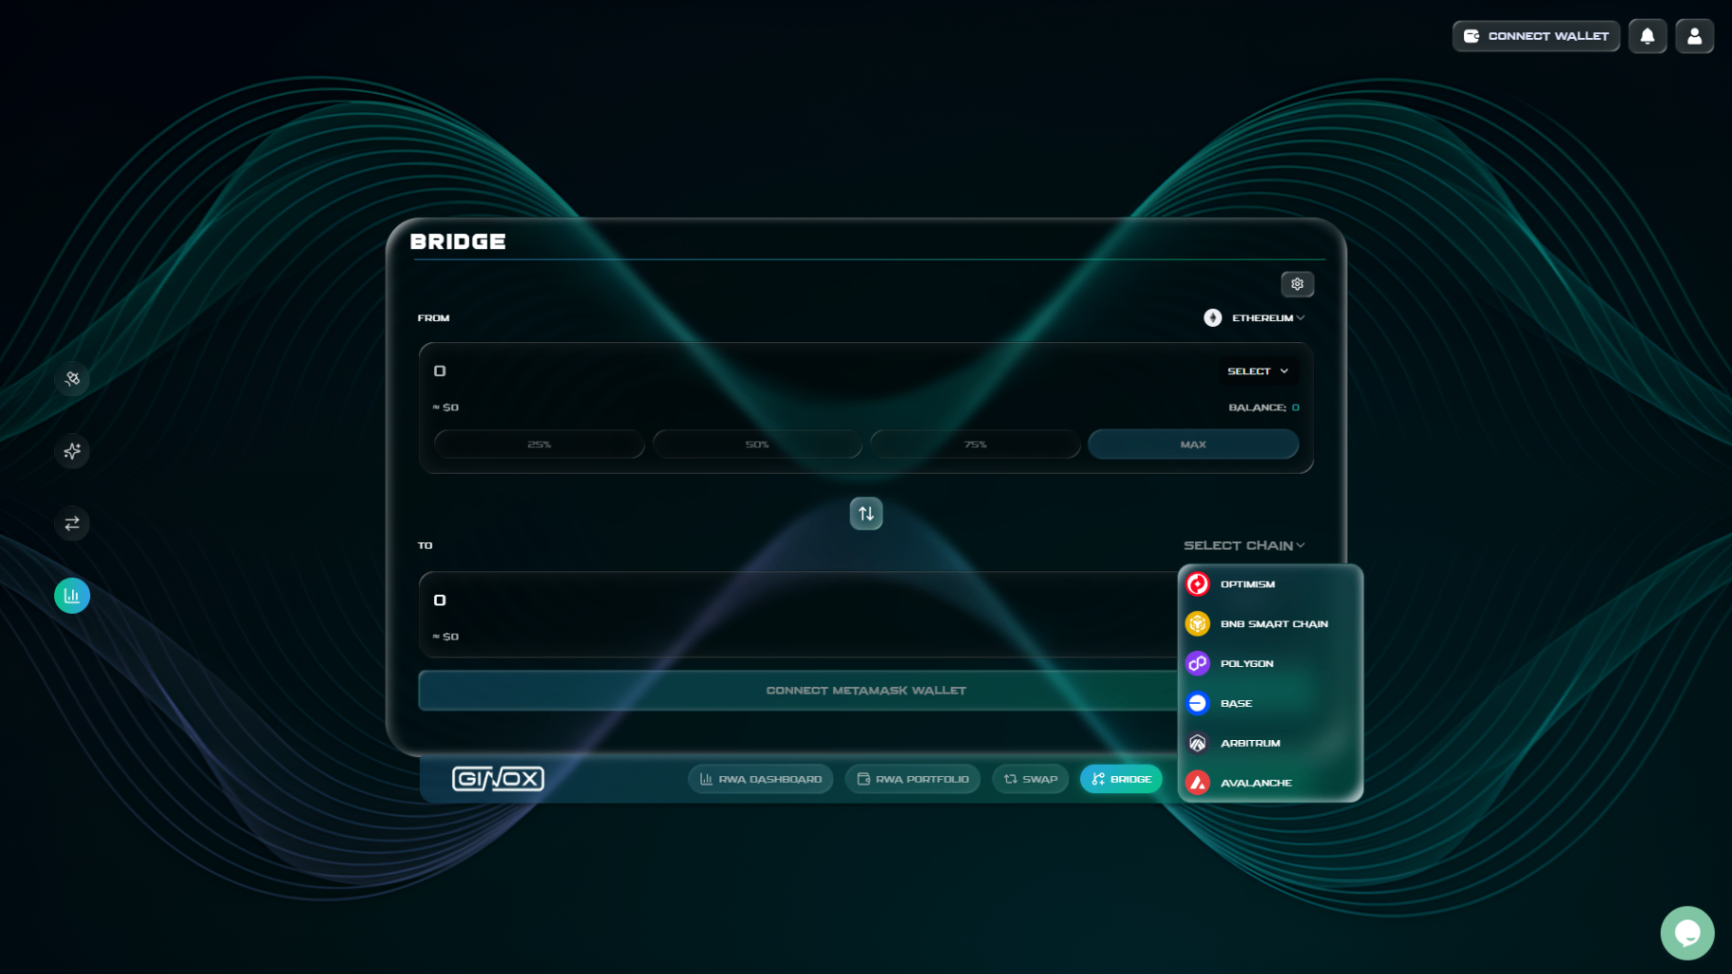
The destination chain selector showing all available networks.
Step 5: Choose Your Token
Click "Select" in the FROM section to pick the token you want to bridge. Search by name or ticker and select the token. For this example, we will bridge USDT.
Once you select a token on the FROM side, GiDex will automatically match it on the destination chain if the same token is available. If you want to receive a different token on the other side, you can click the token selector in the TO section and change it.
Step 6: Enter the Amount
Type the amount you want to bridge in the FROM field. GiDex will fetch a real-time quote and show you how much you will receive on the destination chain in the TO field.
You can use the quick percentage buttons (25%, 50%, 75%, MAX) to quickly set the amount based on your wallet balance. The quote includes the estimated output amount, fees, and the dollar value of both sides so you can see exactly what you are getting.
Step 7: Review and Confirm
Before confirming, double check a few things:
- The FROM and TO chains are correct
- The token and amount look right
- The fees are acceptable
- You have enough native tokens on the FROM chain to cover gas fees (ETH on Ethereum, BNB on BSC, etc.)
If you are bridging an ERC-20 token, you will first need to approve it (just like with swaps). Click "Approve", confirm in your wallet, and then click "Bridge" once the approval goes through.
If you are bridging a native token, you skip the approval step and go straight to the bridge confirmation.
After you confirm the transaction in your wallet, the bridge will start processing. Transfer times vary depending on the chains involved. Some chains settle in under a minute, while others may take several minutes. Once the transfer is complete, the tokens will appear in your wallet on the destination chain.
Frequently Asked Questions
What is the difference between a swap and a bridge?
A swap exchanges one token for another on the same blockchain. A bridge moves a token from one blockchain to a different blockchain. For example, swapping WBNB to USDT on BNB Smart Chain is a swap. Moving USDT from Ethereum to BNB Smart Chain is a bridge.
How long does a bridge transfer take?
It depends on the chains you are bridging between. Transfers between faster networks like BNB Smart Chain, Arbitrum, or Polygon can settle in under a minute. Transfers involving Ethereum may take a few minutes longer due to block confirmation times. In rare cases, high network congestion can cause additional delays.
Can I bridge between any two chains?
You can bridge between any combination of the seven supported chains: Ethereum, BNB Smart Chain, Arbitrum, Optimism, Base, Avalanche, and Polygon. The only rule is that the FROM and TO chain must be different.
What happens if my bridge gets stuck?
Bridge transactions occasionally take longer than expected, especially during periods of high network activity. If your transaction has been confirmed on the source chain but the tokens have not arrived on the destination chain, give it some extra time. Most delays resolve within 10 to 15 minutes. If the issue persists, reach out to the Ginox support team for help.
Do I pay fees on both chains?
You pay a gas fee on the source chain when you submit the bridge transaction. GiDex also charges a transparent bridge fee that is shown in the quote before you confirm. There is no additional gas fee to claim tokens on the destination chain.