Product: Gidex
How to Start Perpetual Trading on GiDex
Perpetual trading lets you speculate on the price of cryptocurrencies, commodities, and indices without owning the actual asset. You can go long (bet the price will rise) or go short (bet the price will drop), and use leverage to amplify your position size. GiDex offers perpetual trading with over 90 markets, up to 100x leverage on major pairs, and USDC as the sole collateral currency. All trading happens on a decentralized order book, so you stay in control of your funds at all times.
This guide walks you through every step from opening the trading page to placing your first order. We will use BTC/USDC as the example, but the steps work the same way for any market on the platform.
Step 1: Open the Perp Trading Page
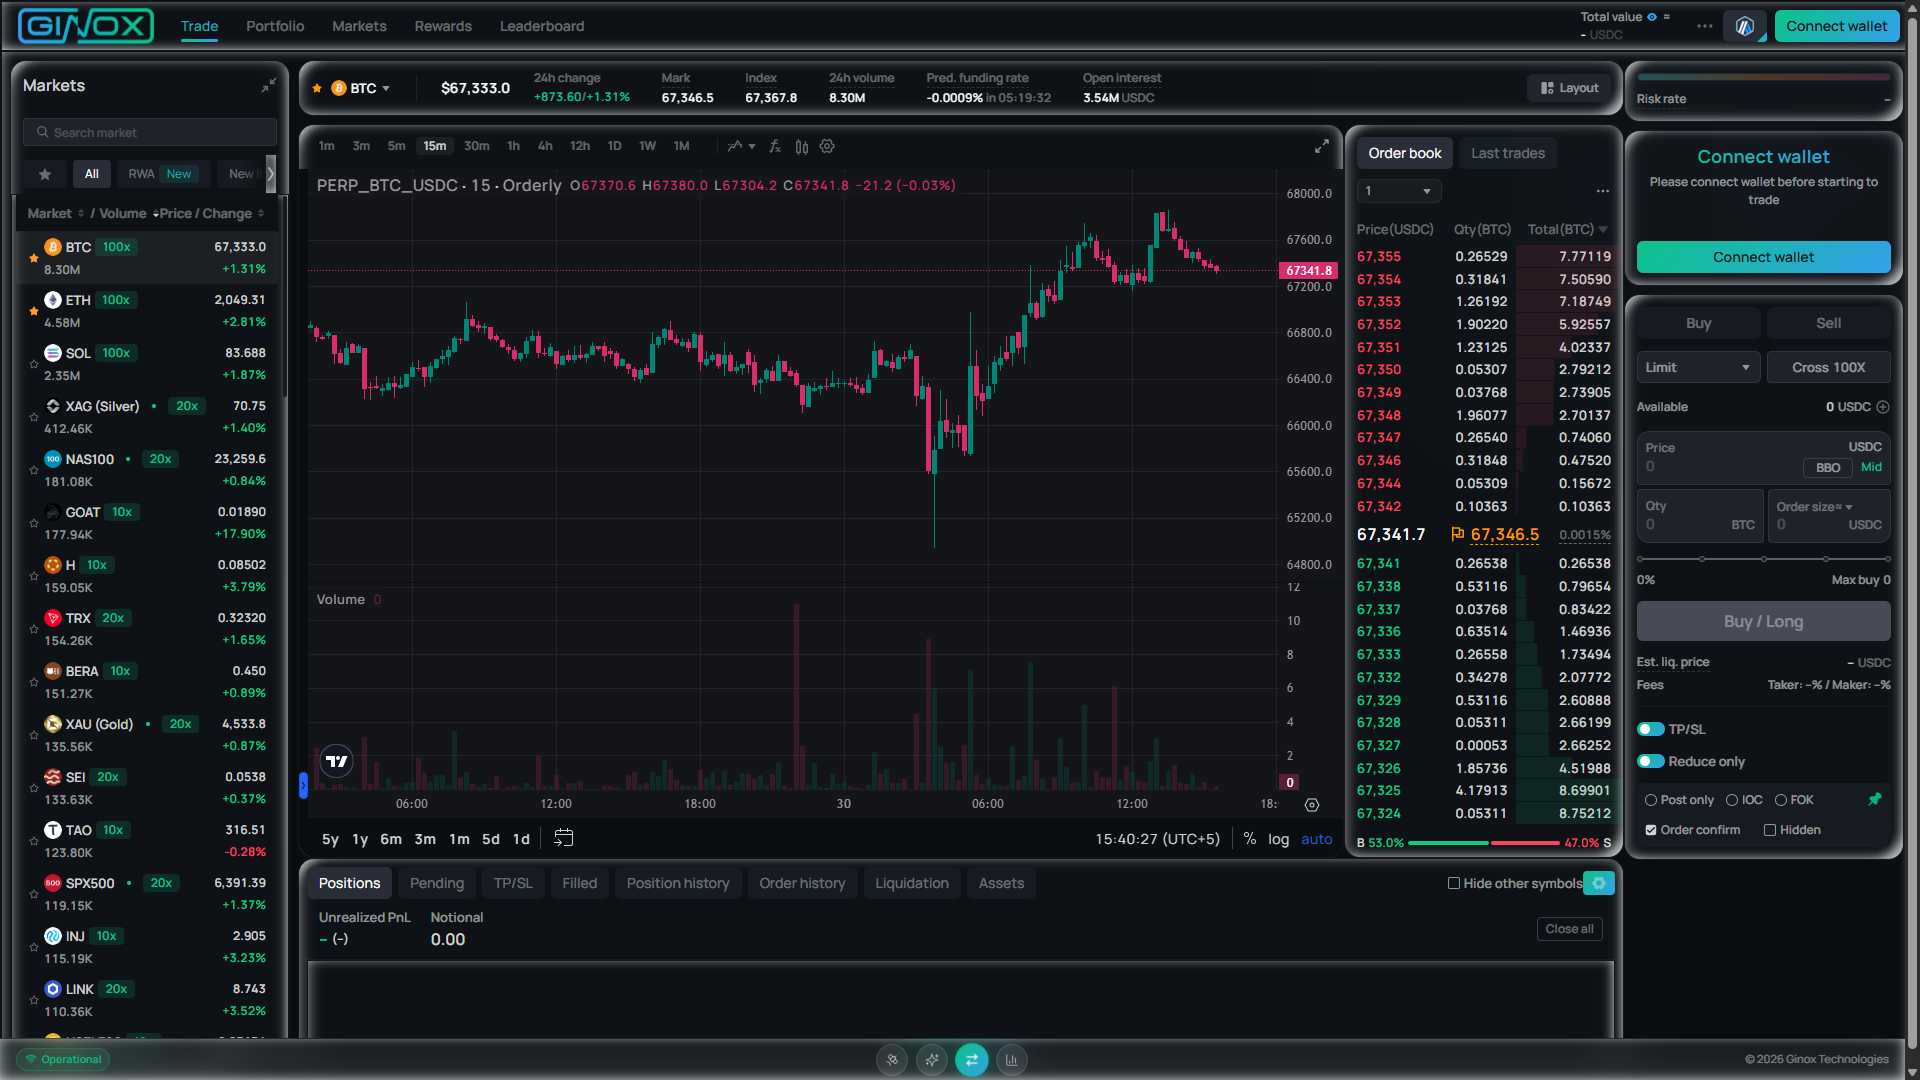
Go to app.ginox.io and click "Trade" in the top navigation bar. The perpetual trading interface will load with a default market (usually ETH/USDC). On the left side you will see a list of all available markets sorted by trading volume. Each entry shows the token name, maximum leverage (for example, 100x for BTC), 24-hour volume, current price, and percentage change. The center of the page displays a live price chart powered by TradingView, and below it you will find the order book and recent trades. The trading panel sits on the right side of the screen.

The GiDex perpetual trading page showing the ETH/USDC market with a live chart, order book, and trading panel.
Step 2: Connect Your Wallet
Click the green "Connect wallet" button in the top right corner of the page. A popup will appear with a list of supported wallets including MetaMask, WalletConnect, and Binance Wallet. Select your preferred wallet, approve the connection request, and sign the login message when prompted. Once connected, your wallet address will replace the button in the top right corner. You can optionally enter a referral code during this step if someone shared one with you.
Step 3: Enable Trading
After connecting your wallet, the platform will ask you to enable trading. This creates a secure signing key that allows the platform to submit orders on your behalf without opening a wallet popup for every single trade. Click "Enable Trading" and confirm the signature request in your wallet. This is a one-time setup and does not cost any gas fees.
Step 4: Approve the Builder Fee
Next, you will see a prompt to approve the builder fee. This is a small fee that applies to each executed trade on the platform. Click "Approve" and confirm the signature in your wallet. Like the previous step, this is a one-time approval with no gas cost. After this step, all future trades will be signed automatically in the background.
Step 5: Deposit USDC
Before you can open any positions, you need to deposit USDC into your trading account. Click the "Deposit" button in the trading panel or in the Portfolio section. Select the amount of USDC you want to deposit and confirm the transaction in your wallet. Once the deposit is confirmed on chain, your balance will appear under "Available" in the trading panel on the right side of the page.
Step 6: Choose a Market and Place a Trade
Use the market list on the left side to pick a trading pair. Click on BTC (or any other token) to load its chart and order book. Then use the trading panel on the right to set up your order:
- Direction: Click "Buy" to go long or "Sell" to go short.
- Order type: Select "Limit" to set your own price, or "Market" to execute instantly at the current price.
- Leverage: Use the dropdown next to the order type to switch between Cross and Isolated margin, and set your leverage (up to 100x on BTC, ETH, and SOL).
- Price and quantity: Enter the price (for limit orders) and the amount you want to trade in the token or in USDC.
- Submit: Click "Buy / Long" or "Sell / Short" to place your order.
You can also toggle on "TP/SL" to attach a take profit or stop loss to your order before submitting it.
The BTC/USDC perpetual trading page on GiDex with the order book, price chart, and trading panel.
Step 7: Monitor Your Position
Once your order is filled, it will appear in the "Positions" tab at the bottom of the page. Here you can see your entry price, current price, unrealized profit and loss, and estimated liquidation price. Use the other tabs to manage your activity:
- Pending: View and cancel open orders that have not been filled yet.
- TP/SL: See and edit your take profit and stop loss orders.
- Filled: Check your recently executed trades.
- Order history: Browse your complete order log.
- Assets: See your full balance breakdown including available and in-use margin.
You can also visit the Markets page from the top navigation bar to explore all available trading pairs, check 24-hour volume, open interest, funding rates, and discover new listings.
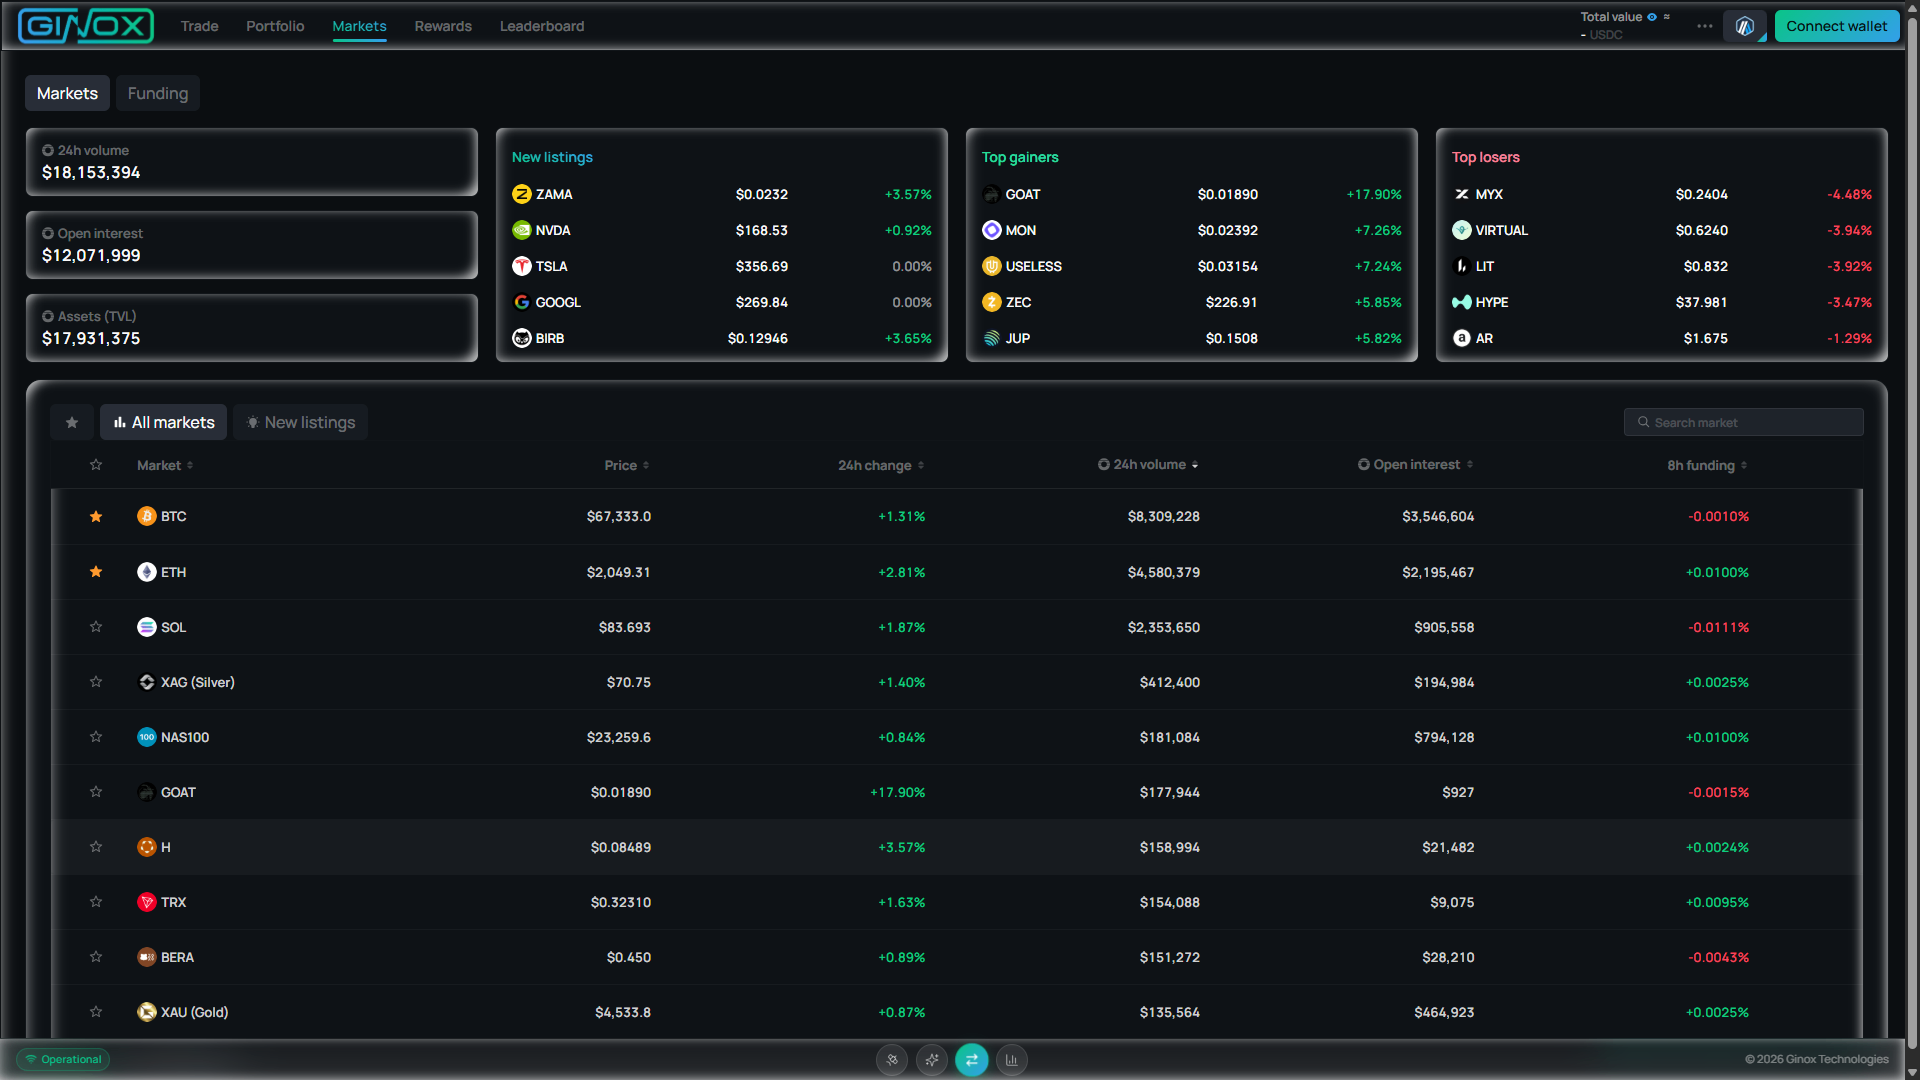
The GiDex Markets page showing 24-hour volume, open interest, top gainers, top losers, and all available perpetual markets.
Frequently Asked Questions
What is perpetual trading?
Perpetual trading is a type of futures trading where contracts never expire. You can hold a position for as long as you want, as long as your margin stays above the maintenance threshold. A funding rate is applied every 8 hours to keep the contract price aligned with the spot price.
What leverage is available on GiDex?
Leverage varies by market. Major pairs like BTC, ETH, and SOL support up to 100x. Commodities such as Gold (XAU) and Silver (XAG) go up to 20x. Smaller tokens and indices typically support 10x or 20x. You can adjust your leverage before placing each trade.
What collateral do I need to trade?
All perpetual markets on GiDex use USDC as collateral. You deposit USDC into your trading account and all profits and losses are settled in USDC.
How are trading fees calculated?
Fees are split into maker and taker rates. Limit orders that sit on the order book are charged a lower maker fee. Market orders that execute immediately are charged a slightly higher taker fee. A builder fee also applies to each trade. You can view your current fee tier in the Portfolio section under "Fee tier".
What happens if my position gets liquidated?
If the market moves against your position and your margin drops below the maintenance level, the position is automatically closed to prevent further losses. You can monitor your estimated liquidation price in the Positions tab at any time. Using lower leverage and setting stop loss orders are two practical ways to reduce liquidation risk.